Cross-Chain Bridging
Bridge assets seamlessly across different blockchains
Bridging on Nexa allows you to transfer assets between different blockchains seamlessly. Our integrated bridge solution powered by LIFI supports multiple chains and provides a secure, efficient way to move your tokens across ecosystems.
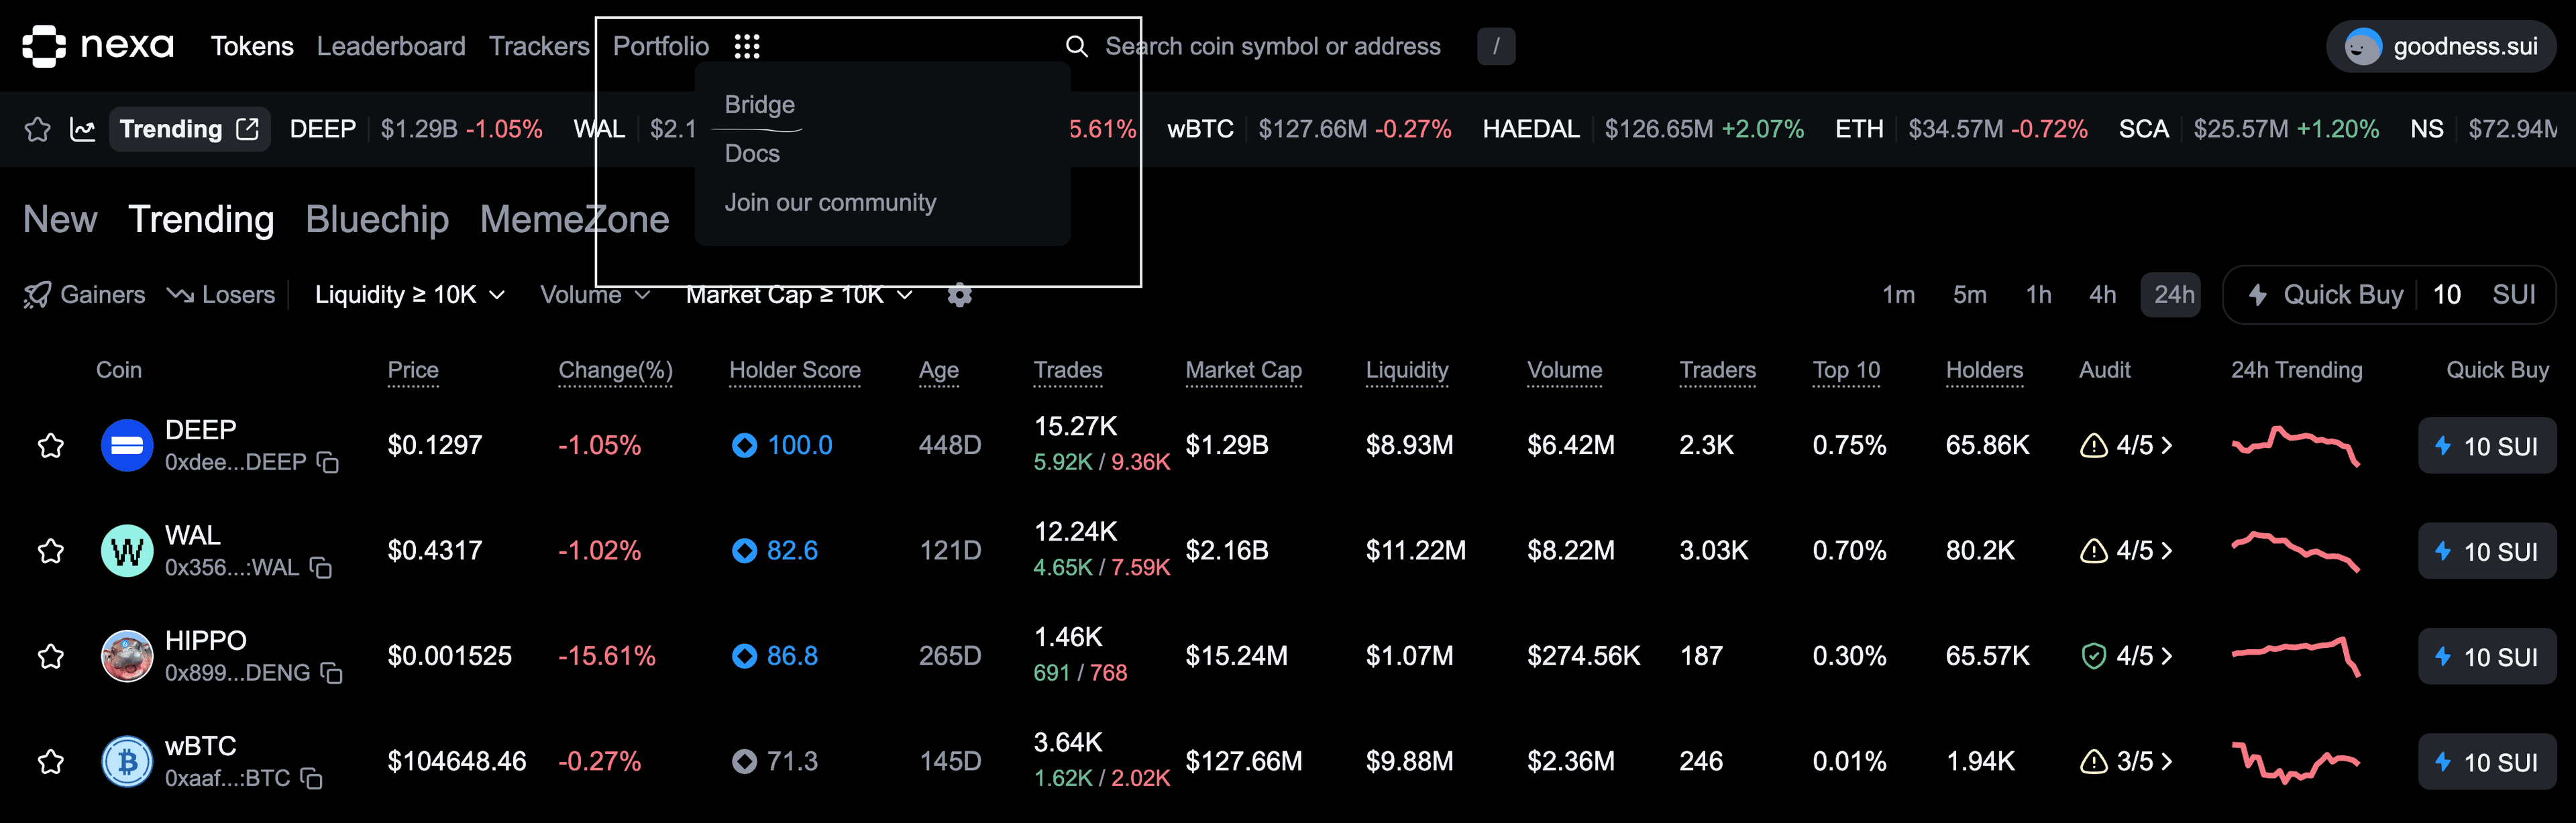
Access the bridging functionality through the Nexa app at app.nexa.xyz/bridge.
LIFI's bridging solution prioritizes security and speed, with built-in safeguards and optimized routing for the best cross-chain experience.
Supported Chains and Tokens
Nexa's LIFI supports bridging between major blockchains including:
- Sui Network - Native SUI tokens and Sui-based assets.
- Solana - SOL and SPL tokens.
- Ethereum - ETH and ERC-20 tokens.
- And more - Up to 40 additional chains.
Bridge Routes
Our bridge automatically finds the best route for your transaction, considering factors like fees, speed, and security. Popular routes include SUI ↔ SOL, ETH ↔ SUI, and many others.
How to Bridge Assets on Nexa?
Bridging Considerations
- Cross-chain transactions take longer than single-chain swaps
- Always double-check destination wallet addresses
- Bridge fees vary based on network congestion
- Some bridges may have minimum transfer amounts
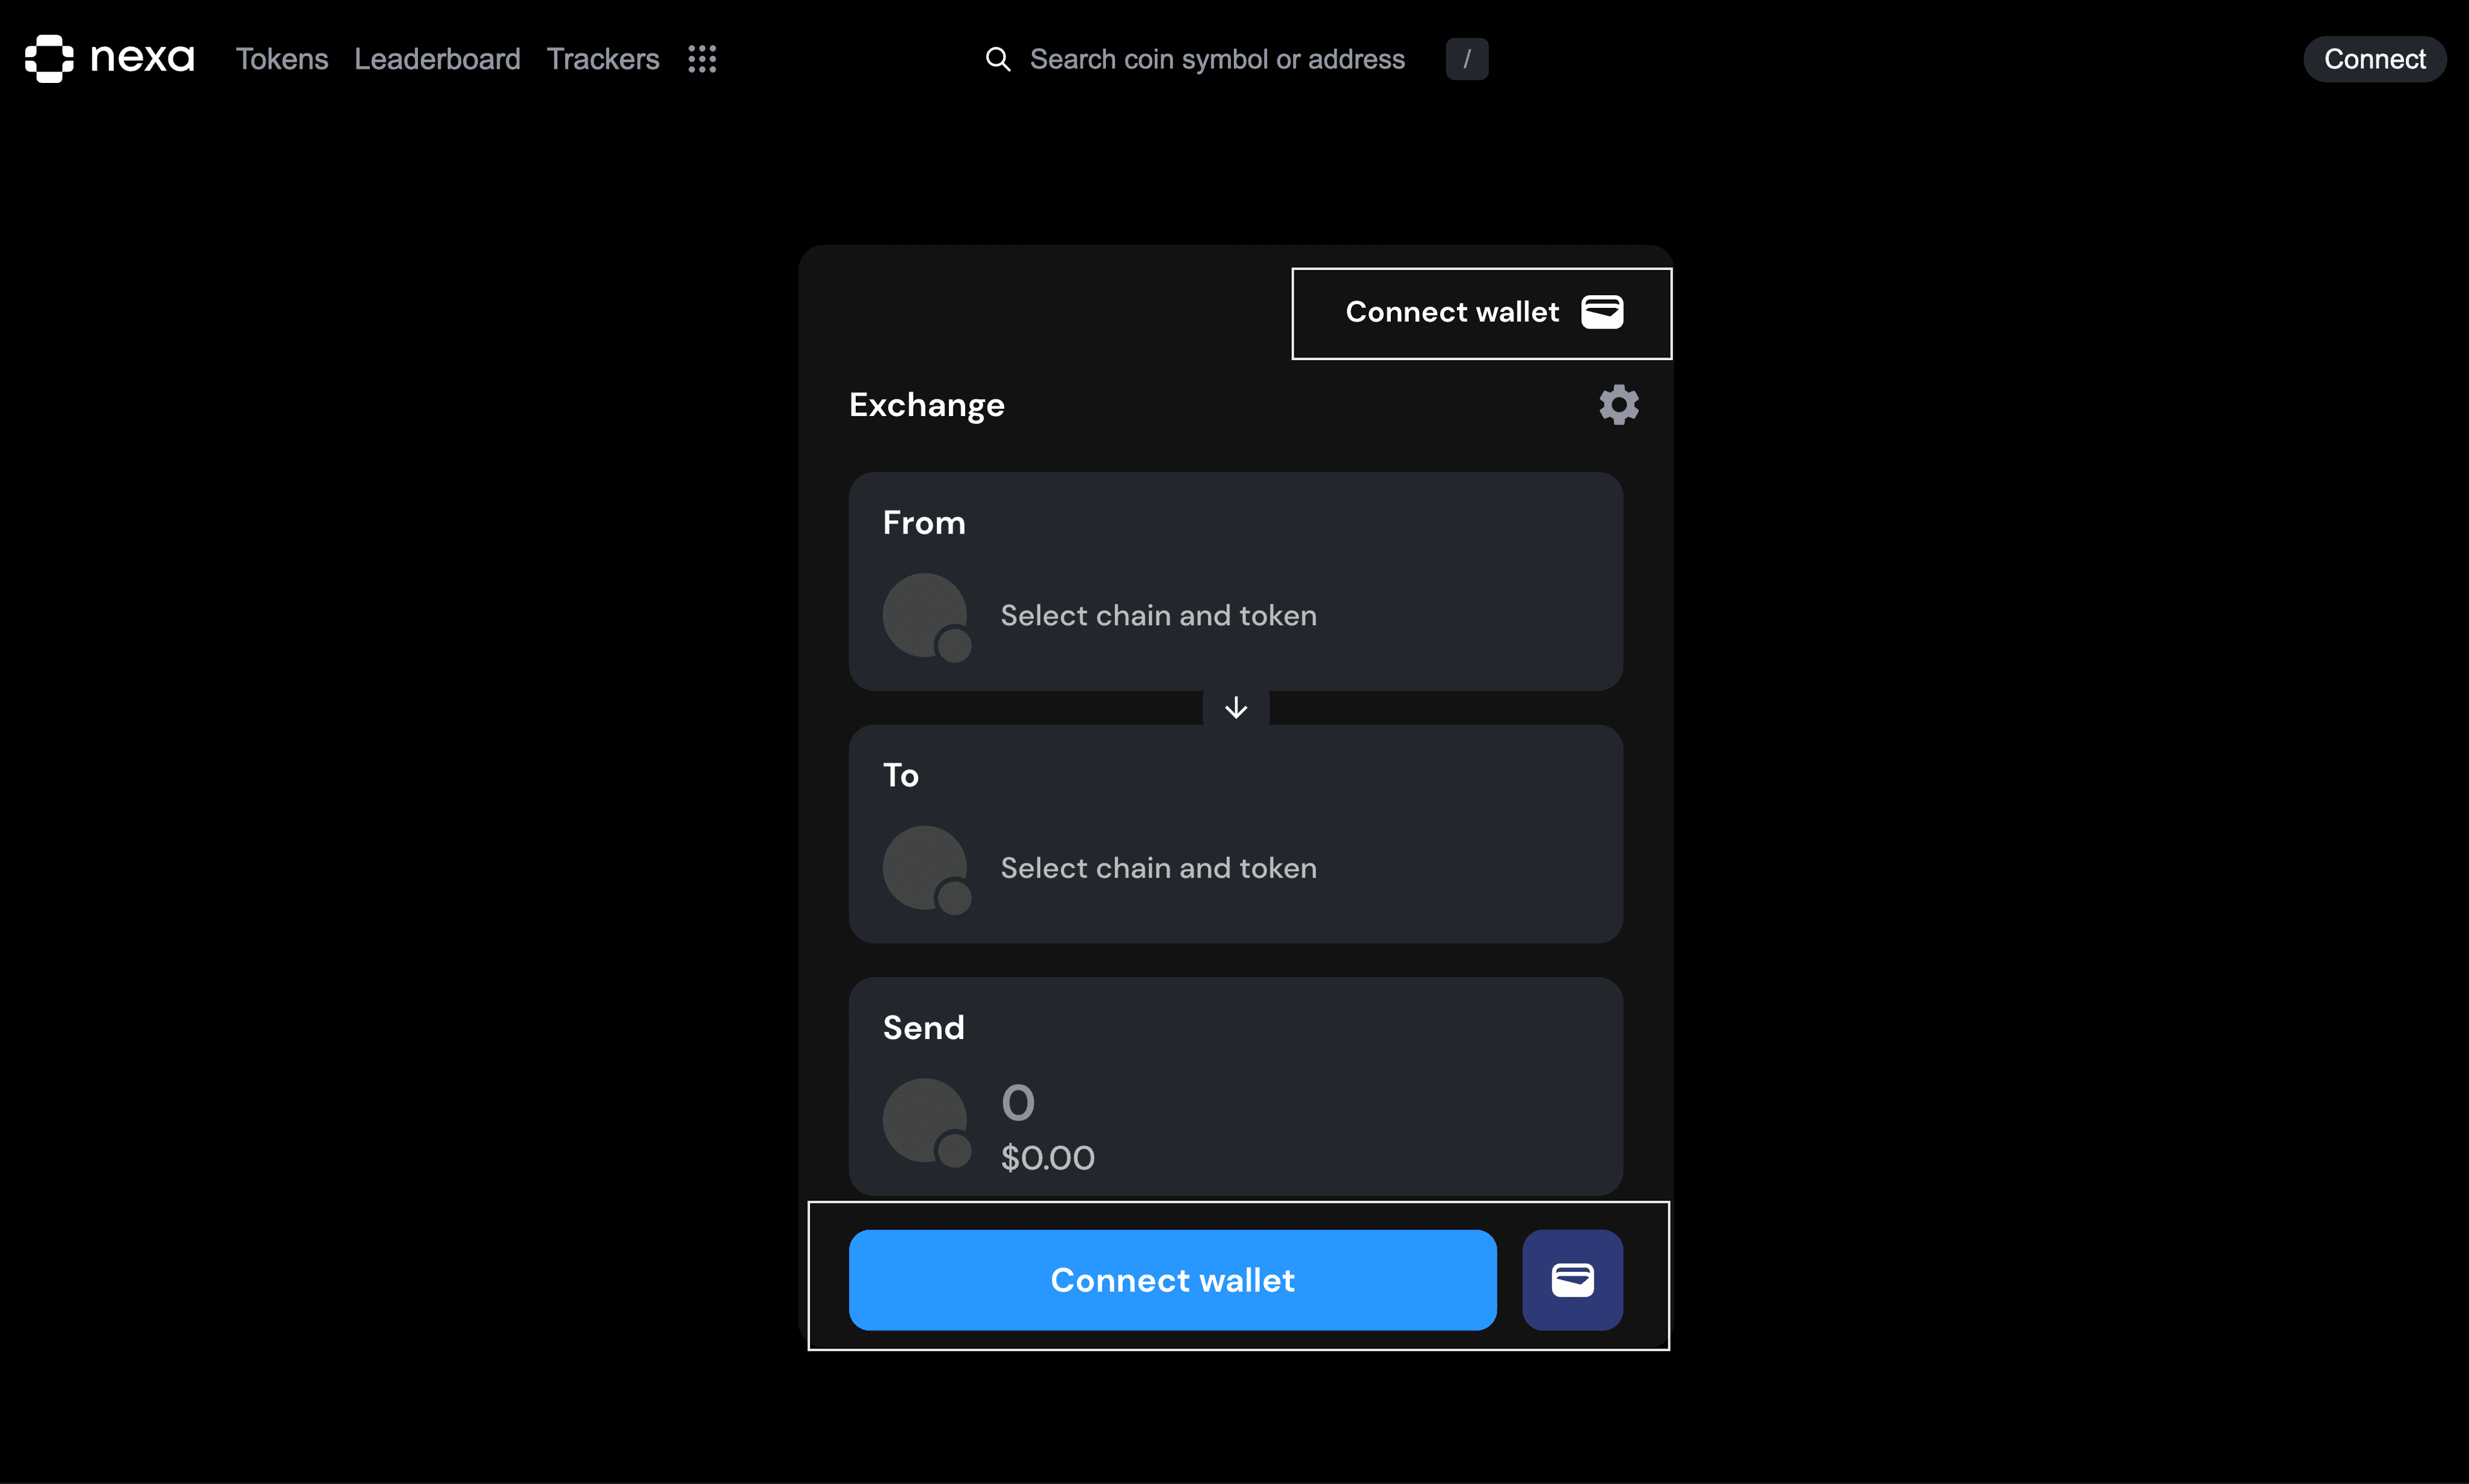
Connect Your Wallet
Start by connecting your Web3 wallet to the Nexa bridge interface. Click "Connect wallet" to link your wallet and ensure you have the necessary permissions.
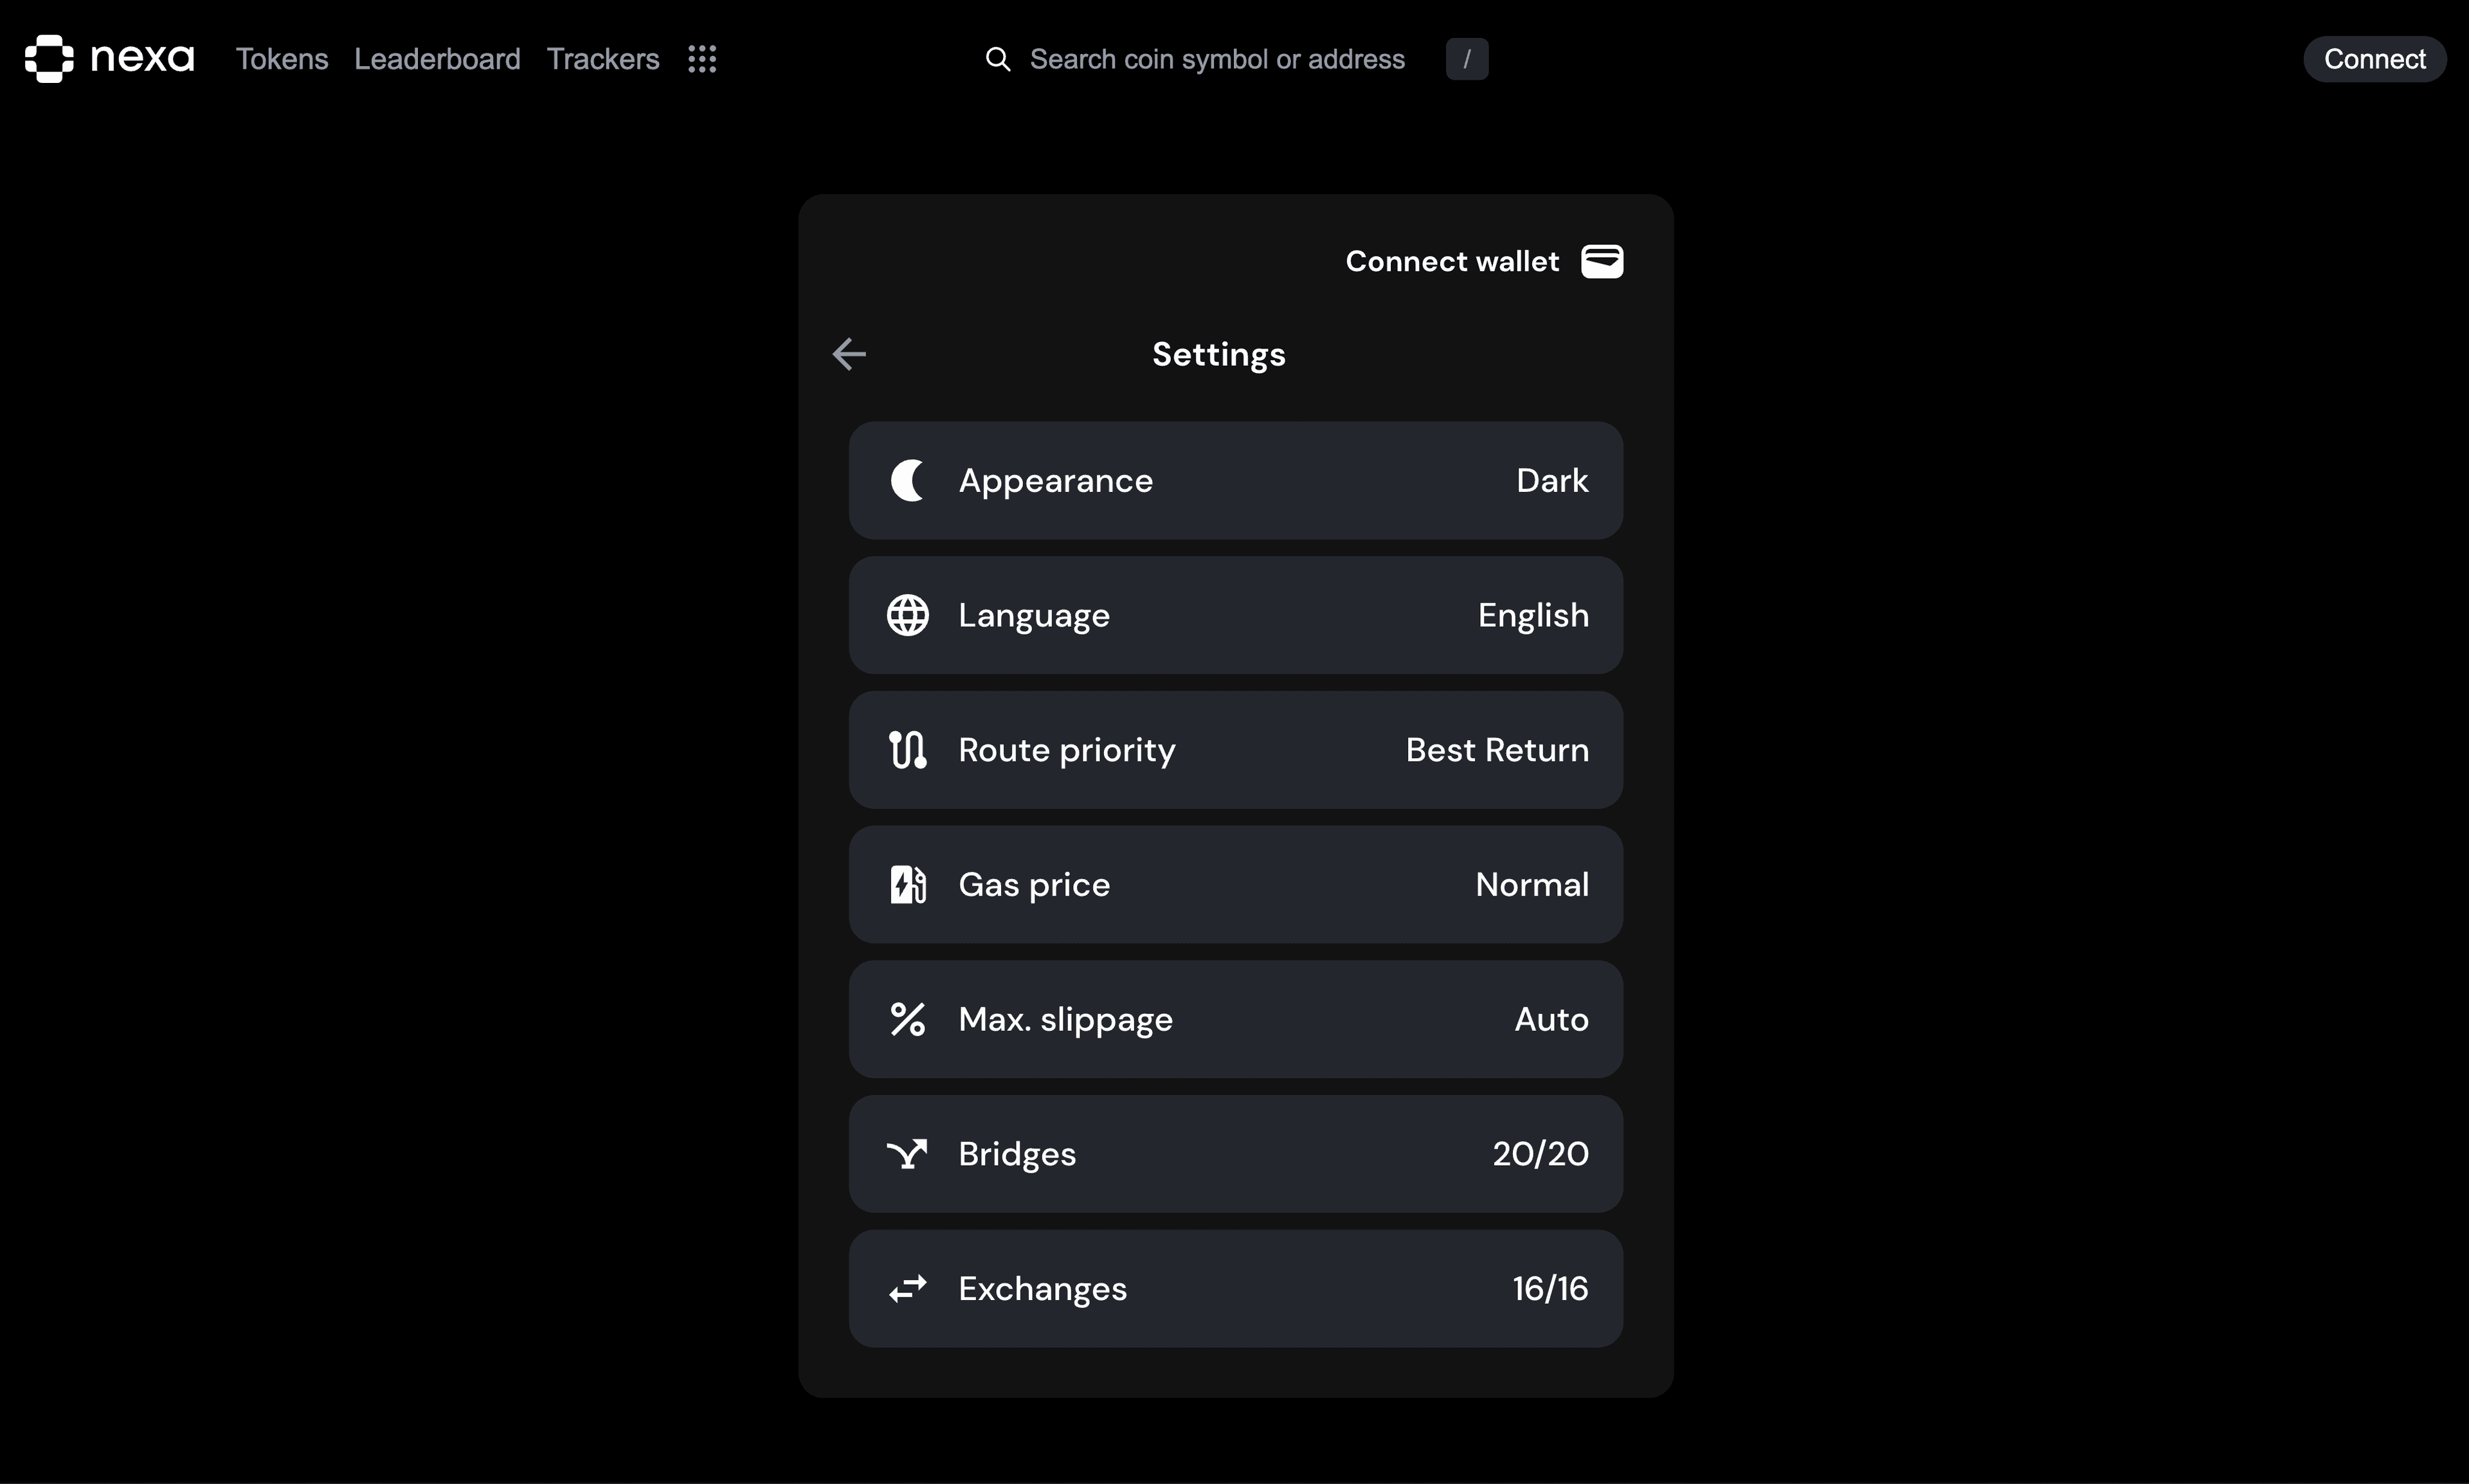
Set Bridging Presets
Customize your bridging experience through the settings panel:
- Route Priority - Choose between "Best Return" for optimal rates or "Fastest" for speed
- Gas Price - Set to "Normal" for standard fees or adjust based on network conditions
- Max Slippage - Configure slippage tolerance (Auto recommended for most users)
- Bridges - Select which bridge protocols to use (20/20 available)
- Exchanges - Choose which exchanges to route through (16/16 available)
Select Source and Destination Chains
Choose which blockchain you're bridging from and to. Select your source chain (where your tokens currently are) and your destination chain (where you want to send them).

Important
The destination wallet address is required to proceed with the transfer. Make sure you connect the destination chain wallet or enter the correct address for the destination blockchain.
Choose Tokens and Enter Amount
Select the token you want to bridge from the source chain and the corresponding token on the destination chain. Enter the amount you wish to bridge. The interface will show you the estimated amount you'll receive after fees.
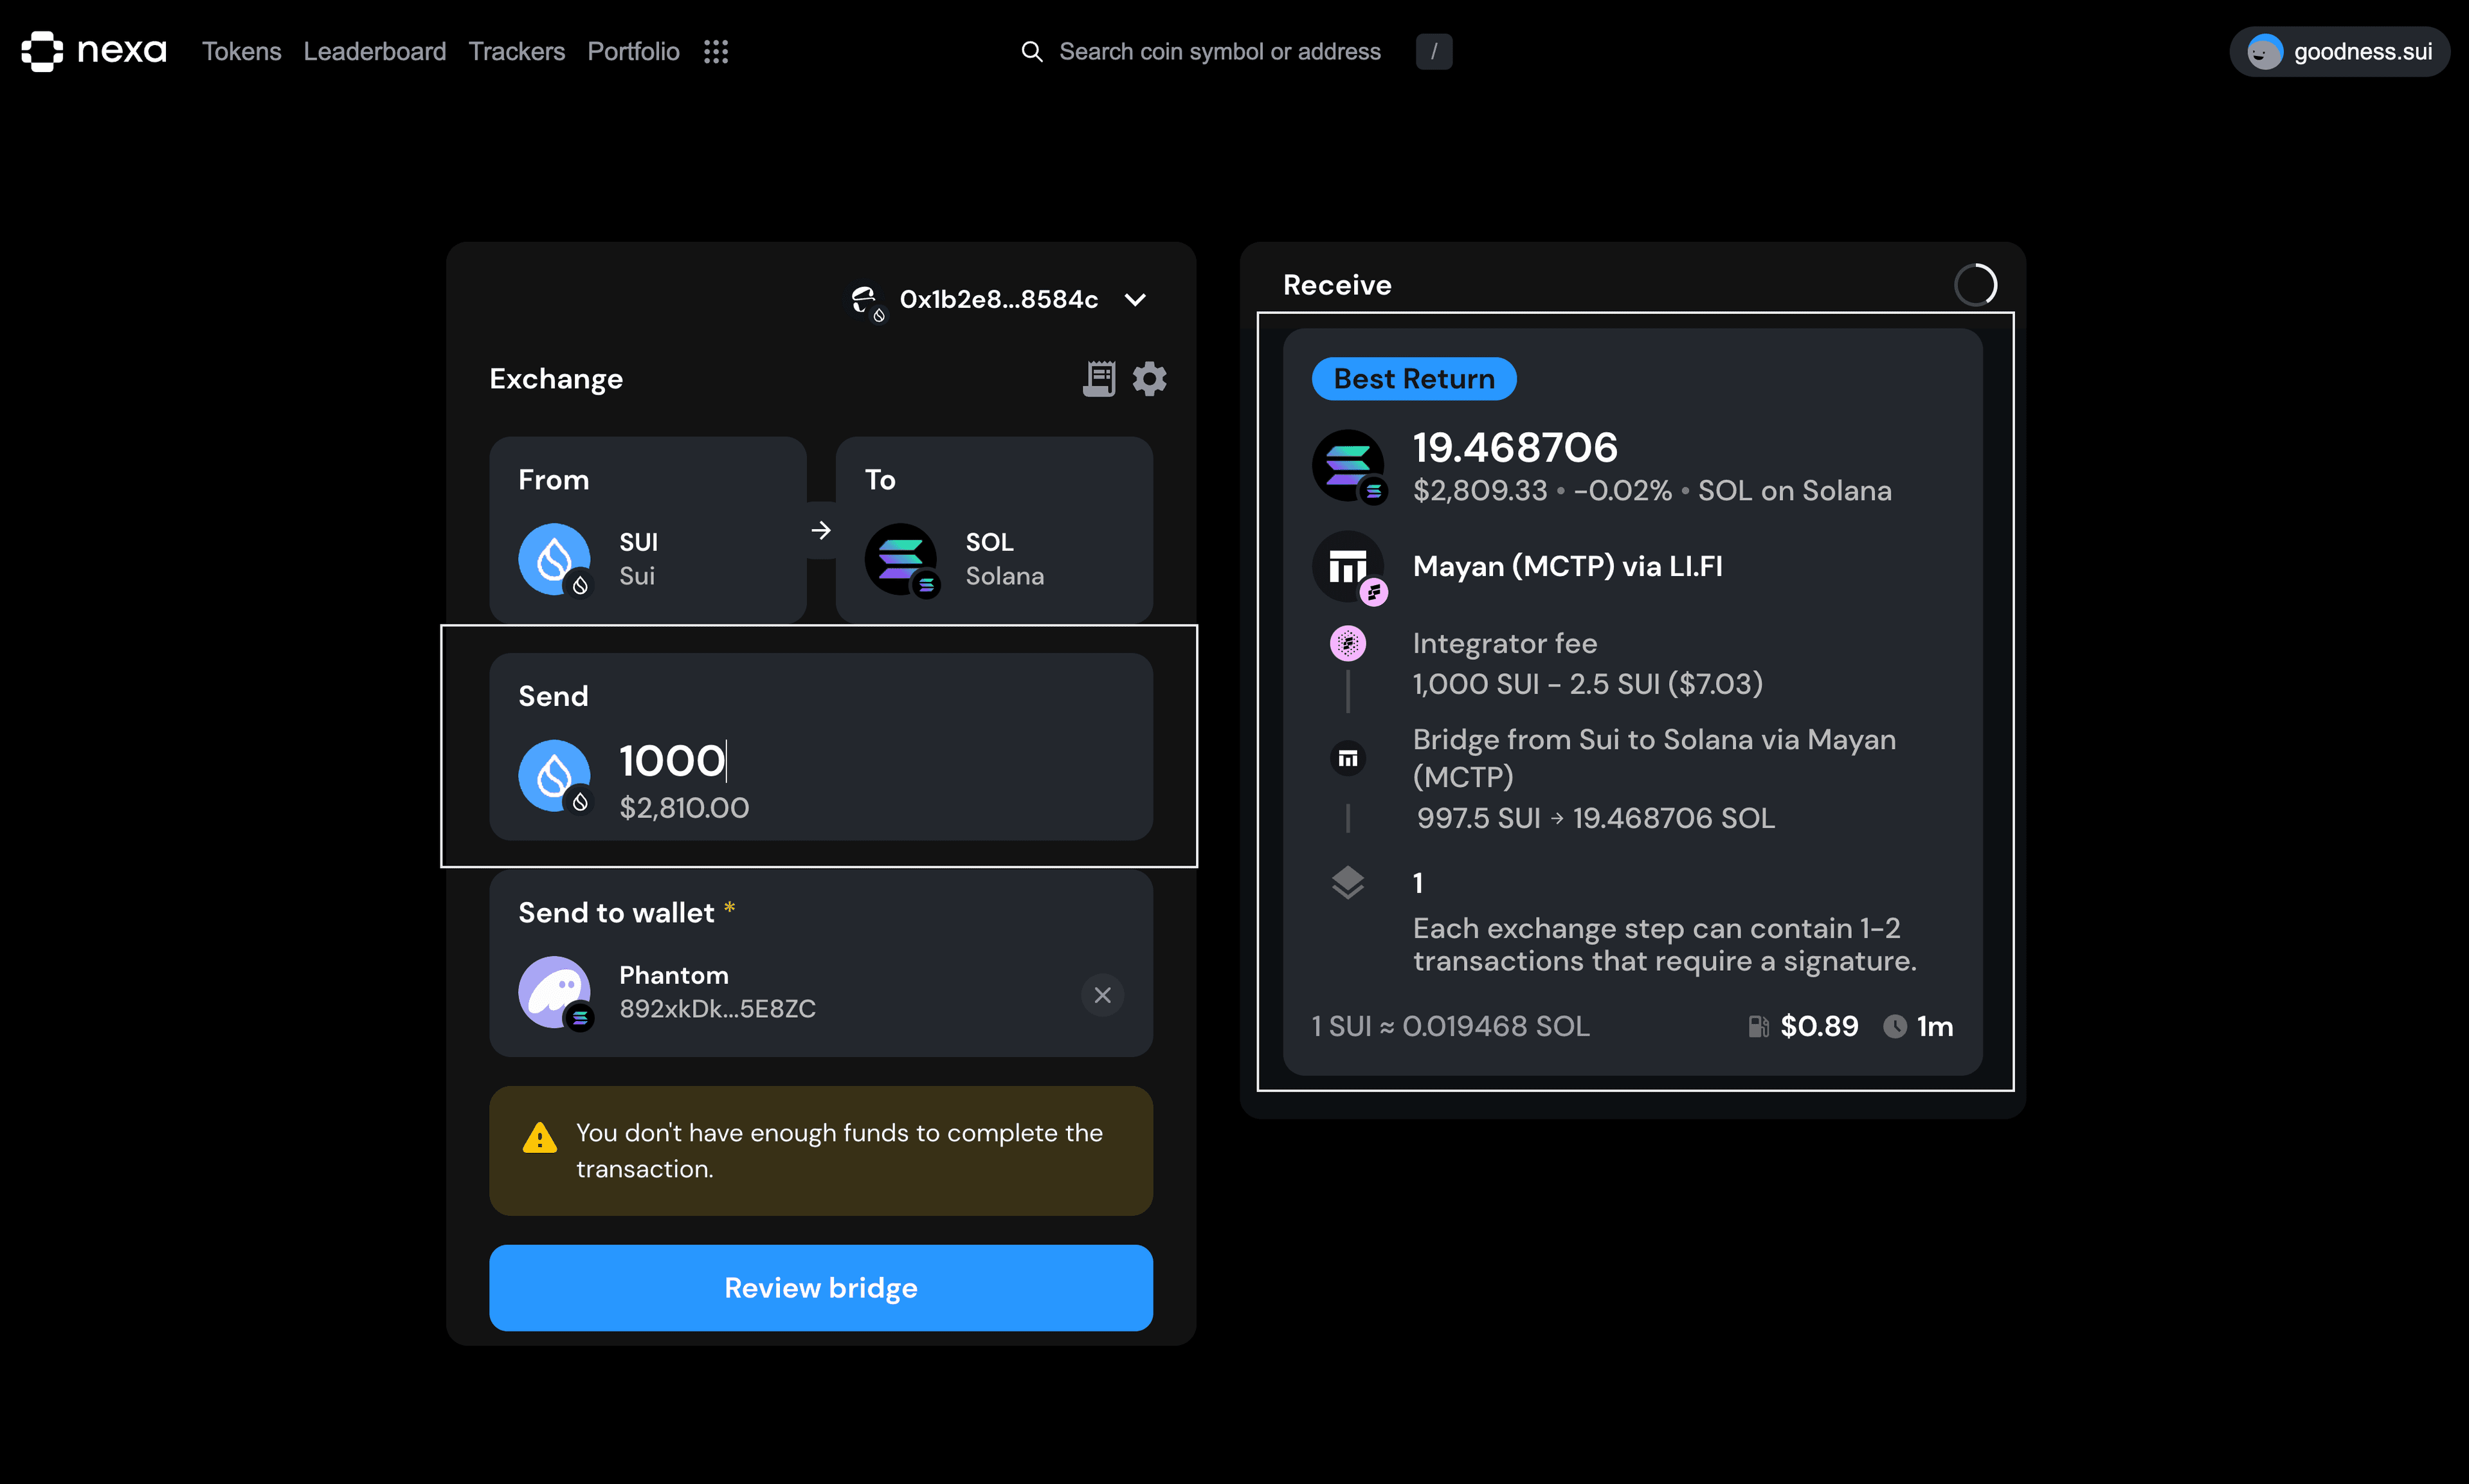
Review and Execute Transaction
Review all transaction details including source and destination tokens, bridge route, fees, and estimated received amount. Sign the required transactions in your wallet to complete the bridge.
Best Practices
- Start with smaller amounts to test the bridge process
- Keep some native tokens for gas fees on both chains
- Monitor bridge status and allow sufficient time for completion
- Save transaction hashes for tracking purposes